Setting up a breeding tank that successfully triggers axolotl spawning requires precise environmental conditions and specialized equipment most keepers never consider. The difference between watching your axolotls ignore each other and finding hundreds of viable eggs comes down to water temperature manipulation, strategic tank design, and timing your breeding cycle with their natural hormonal responses.
Why Axolotl Breeding Demands Specialized Tank Conditions
Axolotls breed seasonally in the wild, responding to specific temperature and photoperiod changes that signal optimal conditions for reproduction. Research on axolotl reproduction shows these amphibians require a cooling period followed by gradual warming to trigger spawning behavior. Your standard axolotl tank maintains steady temperatures year-round, effectively suppressing their breeding instincts.
Successful breeding setups replicate the temperature fluctuations of Lake Xochimilco's seasonal cycles. This means dropping water temperatures to 50-54°F (10-12°C) for 6-8 weeks, then gradually warming to 64-68°F (18-20°C) over 2-3 weeks. The temperature manipulation stimulates hormone production and courtship behaviors that simply won't occur in stable conditions.
The breeding process itself creates unique water quality challenges. Spawning adults produce significant waste during courtship, while hundreds of eggs and developing larvae create bioload spikes that overwhelm standard filtration. You need redundant filtration, precise water parameter monitoring, and separate spaces for different life stages.
Essential Breeding Tank Equipment and Setup
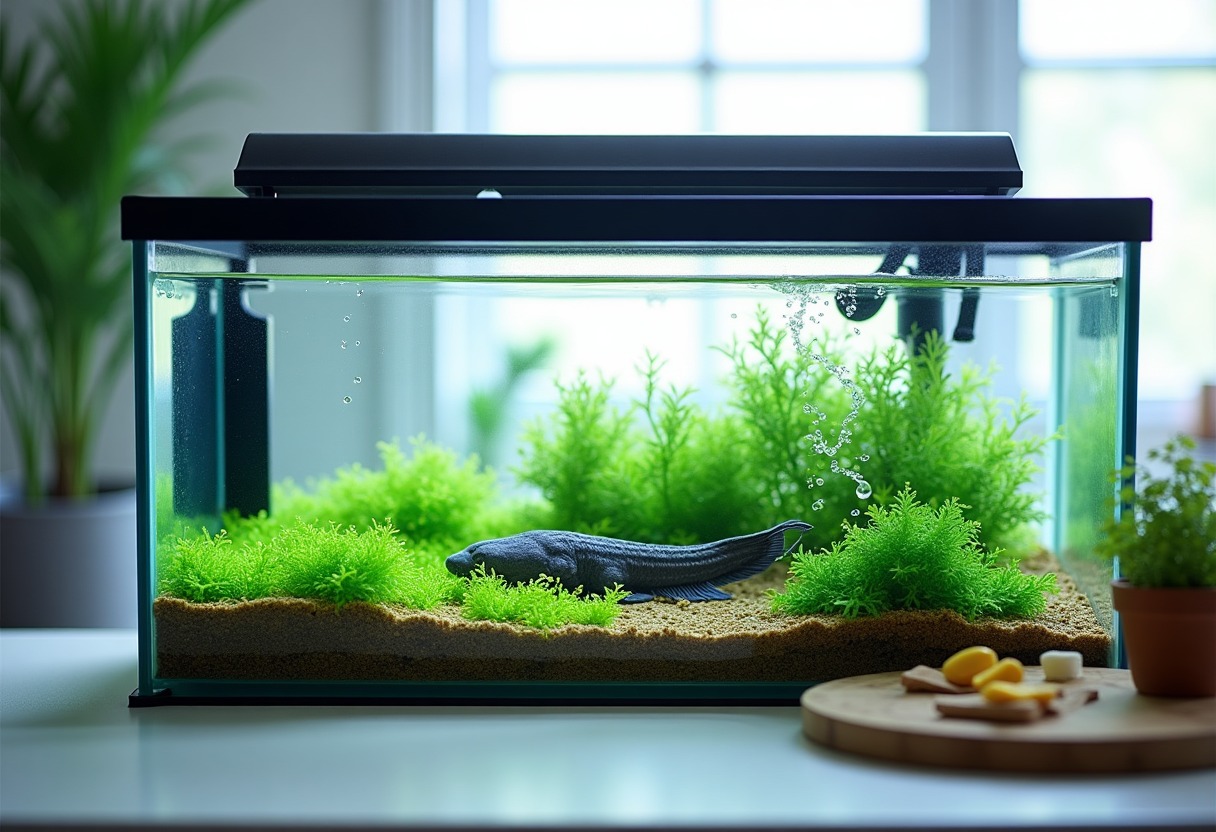
Your breeding system requires three distinct areas: a conditioning tank for pre-breeding care, a spawning tank for mating, and nursery tanks for eggs and larvae. The conditioning tank should be 40 gallons minimum for a breeding pair, allowing proper territory establishment during courtship.
Install a reliable chiller system capable of reaching 50°F consistently. → Shop small aquarium heaters on Amazon for the warming phase, but invest in a quality chiller for cooling. Temperature stability during the cooling period is crucial—fluctuations can disrupt the hormonal cascade needed for breeding readiness.
Spawning substrates make the difference between scattered eggs and organized clusters. Natural spawning mops or artificial alternatives provide ideal attachment points for eggs. → Shop spawning mops aquarium on Amazon offer the fine-textured surfaces females prefer for egg laying. Position multiple mops throughout the tank to give the female choices and prevent territorial disputes.
Water circulation needs careful balance during breeding. Maintain gentle flow to prevent egg damage while ensuring adequate oxygenation. Sponge filters or low-flow canister filters work best, avoiding the strong currents that can damage delicate eggs or stress courting adults.
Your Axolotl Tank Setup Guide covers basic filtration, but breeding tanks need additional biological media capacity. Double your normal bio-media volume to handle the increased waste load from breeding behaviors and developing eggs.
Water Parameter Management for Successful Spawning
Breeding axolotls demands stricter water parameter control than standard keeping. Ammonia and nitrite levels must stay at absolute zero throughout the breeding cycle, as developing eggs and larvae show extreme sensitivity to nitrogen compounds.
| Parameter | Normal Tank | Breeding Tank | Nursery Tank | Critical Notes | |-----------|-------------|---------------|--------------|----------------| | Temperature | 60-64°F | 50-68°F cycling | 65-68°F stable | Temperature manipulation triggers breeding | | pH | 7.4-7.6 | 7.4-7.6 stable | 7.4-7.6 stable | Stability more critical than exact value | | Ammonia | 0 ppm | 0 ppm strict | 0 ppm strict | Zero tolerance during egg development | | Nitrite | 0 ppm | 0 ppm strict | 0 ppm strict | Toxic to developing larvae |
Monitor water parameters daily during the breeding cycle using quality test kits. Your Axolotl Water Testing Kits guide covers the best options, but breeding requires API Master Test Kit minimum for accuracy. Digital meters provide faster readings during critical periods but need regular calibration.
Water changes during breeding follow different protocols. Perform 25% changes every other day during courtship to remove pheromones and waste buildup. Once eggs are laid, reduce to 15% changes every three days to avoid disturbing developing embryos. Use temperature-matched, dechlorinated water exclusively—temperature shocks can kill developing eggs within hours.
The cooling period requires gradual temperature reduction over 7-10 days to avoid shocking your axolotls. Drop temperatures 2-3°F daily until reaching target cooling temperature. Similarly, the warming phase should increase 1-2°F daily to simulate natural spring conditions. Sudden temperature changes abort the breeding cycle and can cause stress-related illness.
Product Recommendations for Breeding Success
Breeding tank dividers become essential once spawning occurs. → Shop breeding tank dividers on Amazon allow you to separate males from females post-spawning while maintaining the same water system. Females often become aggressive after laying eggs, and continued male presence can cause stress.
Brine shrimp hatcheries are non-negotiable for feeding larvae once they absorb their yolk sacs. → Shop brine shrimp hatchery on Amazon provide the live food essential for proper larval development. Newly hatched axolotl larvae cannot digest frozen or prepared foods—they need live, appropriately sized prey.
Breeding nets serve multiple purposes throughout the process. → Shop aquarium breeding nets on Amazon protect eggs from adult predation and allow easy transfer of eggs to nursery tanks. Choose fine mesh that won't damage delicate eggs during handling.
Your backup systems need redundancy during breeding. Install battery-powered air pumps for power outages and maintain spare heaters and chillers. Breeding represents months of preparation—equipment failure during critical periods can destroy entire clutches.
Consider your Best Filters Axolotl Tank 2026 recommendations, but add supplemental sponge filters for nursery tanks. Larvae get sucked into standard filter intakes, so gentle sponge filtration provides necessary biological filtration without risk.
Advanced Egg Care and Larvae Management
Axolotl eggs require specific care protocols that differ dramatically from adult maintenance. Fertile eggs appear clear with visible dark spots (developing embryos), while infertile eggs turn white or cloudy within 24-48 hours. Remove infertile eggs immediately using turkey basters or aquarium vacuum to prevent fungal infections that spread to healthy eggs.
Egg incubation temperature determines development speed and success rates. Maintain 65-68°F for optimal development—higher temperatures increase metabolism but reduce survival rates, while cooler temperatures slow development and increase deformity risks. The 14-21 day incubation period varies with temperature, so track development stages rather than relying on calendar timing.
Fungal prevention becomes critical during egg development. Methylene blue treatment (2-3 drops per gallon) prevents fungal growth without harming developing embryos. Change 50% of treatment water every 3-4 days, re-dosing with methylene blue to maintain protective levels.
Hatching typically occurs at night when larvae absorb remaining yolk sacs and begin free swimming. Newly hatched larvae measure 10-12mm and require live food within 2-3 days. Their mouths are too small for standard axolotl foods, demanding cultured foods like baby brine shrimp, micro worms, or daphnia.
Larvae cannibalism starts early and requires immediate size-sorting. Separate larger individuals into different tanks to prevent predation. Growth rates vary significantly within clutches, creating size disparities that trigger cannibalistic behavior. Size-sort every 7-10 days during the first month.
Your Axolotl Feeding Guide covers adult nutrition, but larvae need 2-3 feedings daily of live foods. Uneaten food pollutes nursery tanks quickly, so feed only what larvae consume within 10-15 minutes. Monitor water quality closely and increase water change frequency if ammonia appears.
FAQ
How long does the complete axolotl breeding cycle take from preparation to independent juveniles? The complete breeding cycle spans 4-6 months from initial conditioning to independent juveniles. This includes 6-8 weeks of cooling conditioning, 2-3 weeks of warming and courtship, 14-21 days of egg incubation, and 8-12 weeks of larval development until metamorphosis. Environmental factors like temperature stability and food quality significantly impact timing, so expect variations of 2-4 weeks in either direction.
What size tank do I need for raising 200+ axolotl larvae successfully? Plan for 1 gallon per 5-10 larvae initially, scaling up as they grow. A 200-egg clutch requires 20-40 gallons of nursery space initially, expanding to 100+ gallons by 6-8 weeks as larvae reach 2-3 inches. Multiple smaller tanks (10-20 gallons each) work better than single large tanks because they allow size-sorting and reduce cannibalism. Each tank needs independent filtration and heating systems for redundancy and quarantine capabilities.
Can I use my main axolotl tank for breeding, or do I need completely separate systems? You need separate breeding systems because the temperature cycling required for spawning would stress or potentially kill non-breeding axolotls in your main tank. Breeding requires 6-8 weeks at 50-54°F, which is below the safe range for normal axolotl keeping. Additionally, breeding behavior creates territorial aggression and increased waste production that disrupts established tank dynamics. Maintain your main tank at stable temperatures while running breeding tanks independently.
What happens if my axolotl eggs develop fungus, and how do I save the healthy ones? Fungal infections appear as white, cotton-like growth on eggs and spread rapidly if untreated. Remove obviously infected eggs immediately using turkey basters or fine tweezers to prevent spread. Treat remaining eggs with methylene blue (2-3 drops per gallon) and increase water flow around egg masses without creating strong currents. Perform daily water changes of 25-30% while maintaining methylene blue levels. Healthy eggs resist mild fungal exposure, but prompt treatment prevents total clutch loss.
How do I know when axolotl larvae are ready to eat solid food instead of live food? Axolotl larvae transition to solid foods around 6-8 weeks when they reach 1.5-2 inches and develop visible external gills. Start offering finely chopped bloodworms or quality pellets soaked until soft while continuing live food offerings. Watch for active hunting behavior and food acceptance over 2-3 feeding sessions. Gradual transition works best—offer solid foods first during feeding times, then supplement with live foods if needed. Complete transition to solid foods typically occurs by 10-12 weeks when larvae approach 3 inches in length.
Successful axolotl breeding requires precise environmental control, specialized equipment, and months of dedicated care—but watching tiny larvae develop into miniature versions of their parents makes every careful parameter check worthwhile.
Some links on this page are affiliate links. We may earn a small commission if you purchase through them, at no extra cost to you.
As an Amazon Associate we earn from qualifying purchases. This article contains affiliate links; if you buy through them we may earn a small commission at no additional cost to you.